Saturday, August 24, 2013

Day 27

Well, today I just spent a few hours getting some things ready.

First, I applied a second coat of the tunnel green paint, so that is complete and ready to go!  Hopefully, the sealing rust preventative paint will keep any more rust from forming and protect the pan from more corrosion.  Considering I'm in a dry climate now...and even if I wasn't...the car won't be a daily driver, I think it is going to be fine for the next 54 years!


I also painted the bare metal that I had welded, so the entire pan has now been coated with 1 coat of the rust preventative silver paint.  I'll need to scuff the paint before I lay down the 2nd silver coat, and then the final black coat.

I also used 3m 8300 seam sealer to protected the joints of the pan from water getting into the car.  These joints will be painted over twice.  I taped out the joints on the first side and found it to be more of a mess.  Luckily the paint will cover it, but the 2nd side looks much better.  I can also scrape/sand away the rough areas if needed.


I'm off to Florida next week, so I'll have to get back to it the week after that!

Tuesday, August 20, 2013

Day 26 - It's been a while. And it's up and down.

I have been working quite a bit the last few weeks so that is the reason for no updates.  Caroline was also in town earlier this month so when I did have days off I was spending time with her, a reasonable trade off I guess ;-)

Today, I finished the welding on the passenger side ear, bottom plate, jack point, and battery pan patch.  I grinded all the welds down and smoothed them out with the flapper disc.


I also painted the inside of the tunnel with the Eastwood Tunnel prep paint.  It is a runny zinc chromate paint that will hopefully prevent any further rust issues.  It's the best I can do without removing the bottom plate of the tunnel which is a task that is not worth the risk of messing up a decent pan.


On a sad note, I hit a curb today with my GTi which really made me mad!  As I was pulling into a parking lot, a car had it's high beams on which distracted me and the curb was closer than I should have been...errr something like that.  Looking at used wheels or a place that can repair them.  I can't bear to look at my stupid, stupid mistake!


Friday, August 2, 2013

Day 25


Well, I got the axle tubes dropped off at the transaxle shop so it is up to them now to finish the transaxle.

I was going to wait and have them painted at the same time as the pan, but the timing just didn't work.  I didn't want to have parts sitting at the transaxle shop (it's been 3 months already) for a variety of different reasons.

I also got the napoleon hat ears media blasted.  Karl at A Strip Center has been great and always gets me in quickly and efficiently.

When I got back from the blaster, I put a layer of my Master Series paint, but did find out that I hadn't sealed the lid properly and had about 3/4 quarts that was hardened.  I ordered more and it should be here next week.


That was on Wednesday.  Today, I started off by cleaning the inside of the tunnel with a degreaser and plenty of water.  I then took a heat gun and my shop vac on "blower" mode and made sure to dry it for a good hour.  I'm getting ready for the special paint I have for the inside of the tunnel which encapsulates rust.  It's called Internal Frame Coating made by Eastwood.

I finished putting the ear and bottom plate on the driver's side and started the passenger.

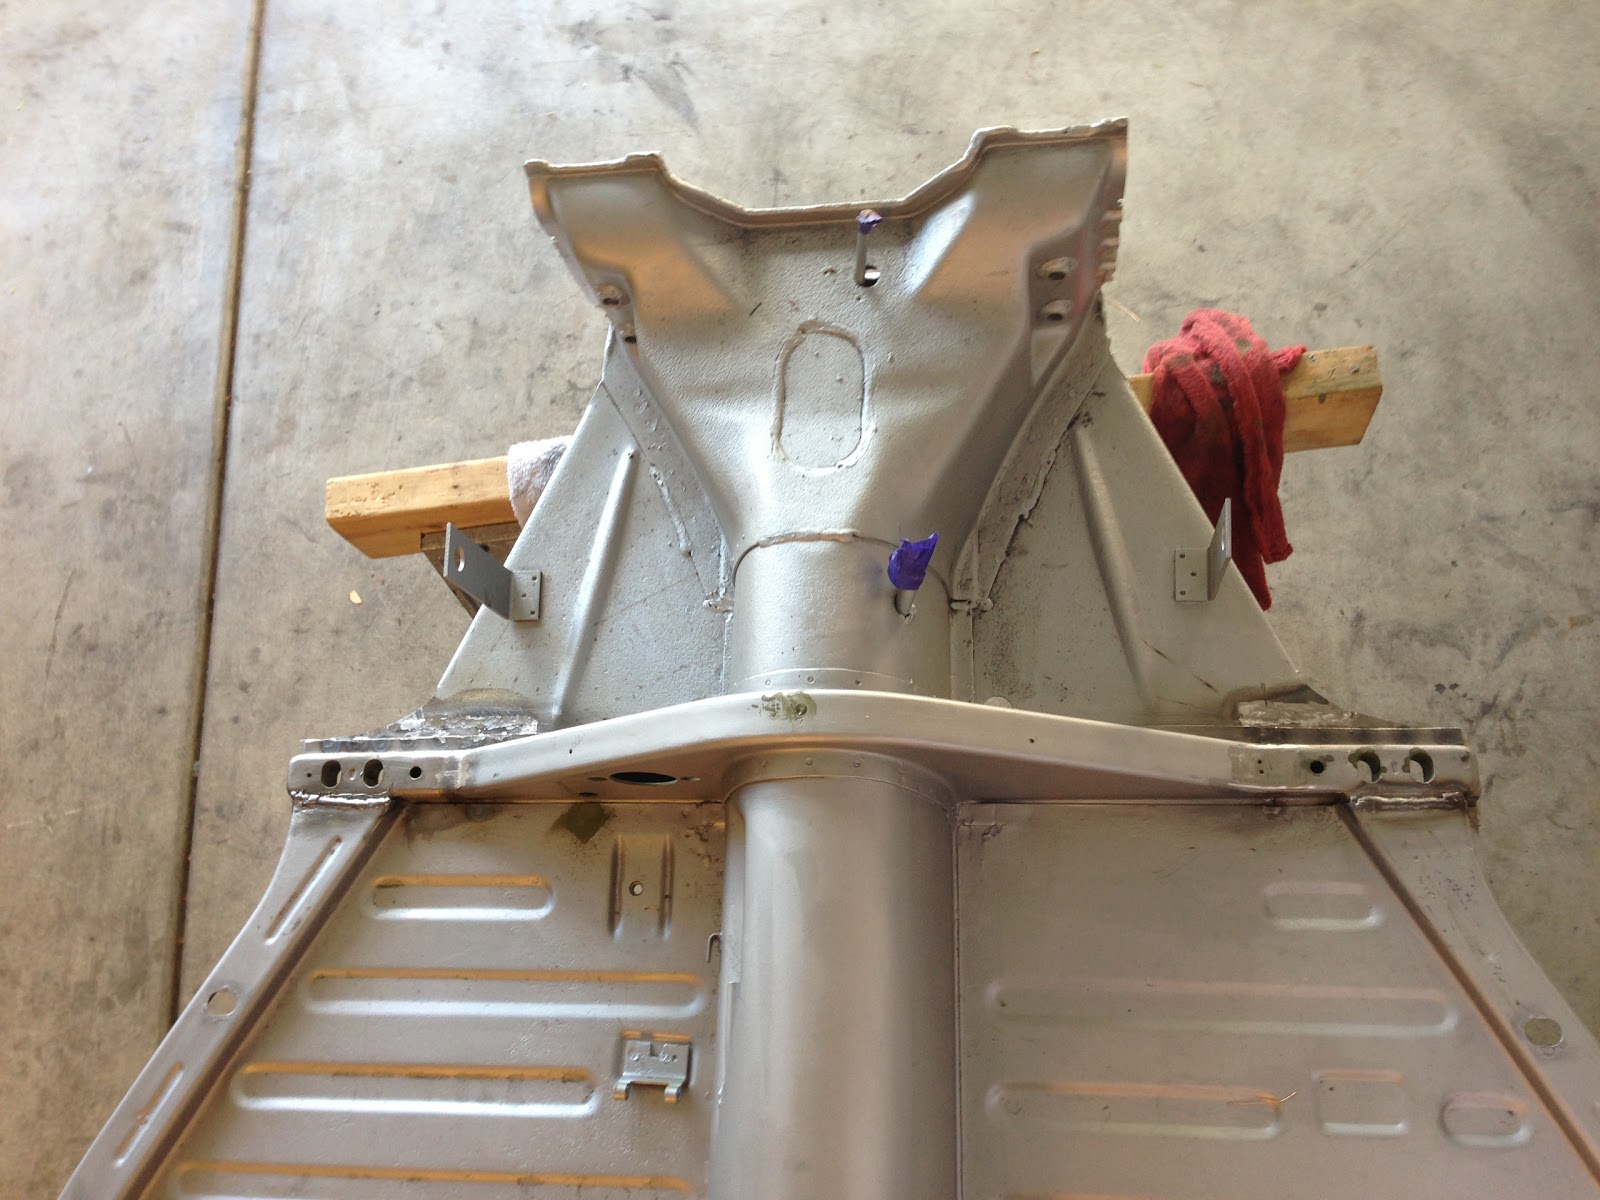
Top part or Napoleon's hat ear
Inside of the ear, with the special encapsulating paint, before I welded.  I'll go back later and get another coat but it is a bit more difficult as there are only a few holes once it is all sealed up.

Test fit.  The gap near the two holes is factory, I replicated it exactly as the other side and also reference pictures.

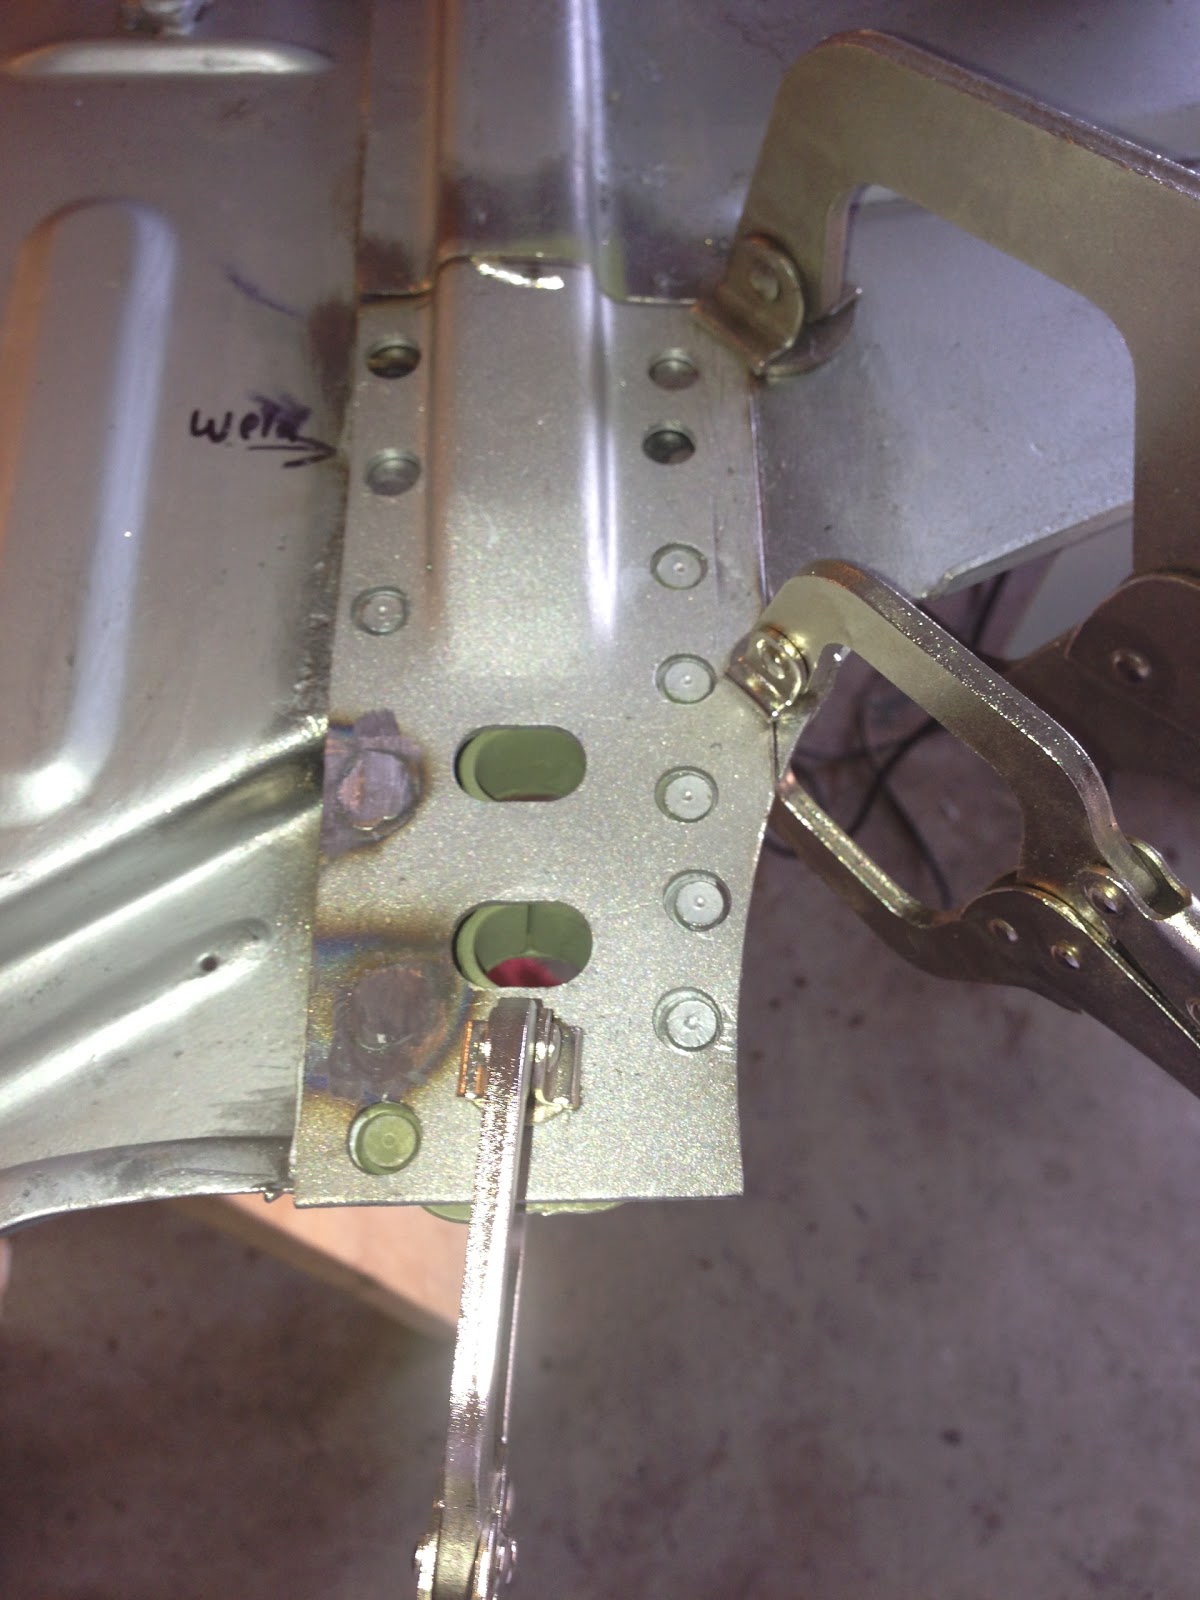
Here are some pictures of the other side, which illustrates again why it was so important to replace them!


Before I painted the other side, and also this one, I took a wire wheel attached to a drill and got all the crusty pieces of rust off as best I could.  That way the paint holds well.


The finished result; needs a better grind and also welded from the bottom (which is really the top) side.