Monday, March 24, 2014

Day 75 -- IT DRIVES!

Today was another good day for progress.  Shorter than some other days, which isn't so bad.

I got up and trouble shot my bad chassis ground.  I determined the problem was two washers on a bolt.  The washers had been clear coated and that was preventing a good ground for the entire chassis.  Fixed it in less than 5 minutes.

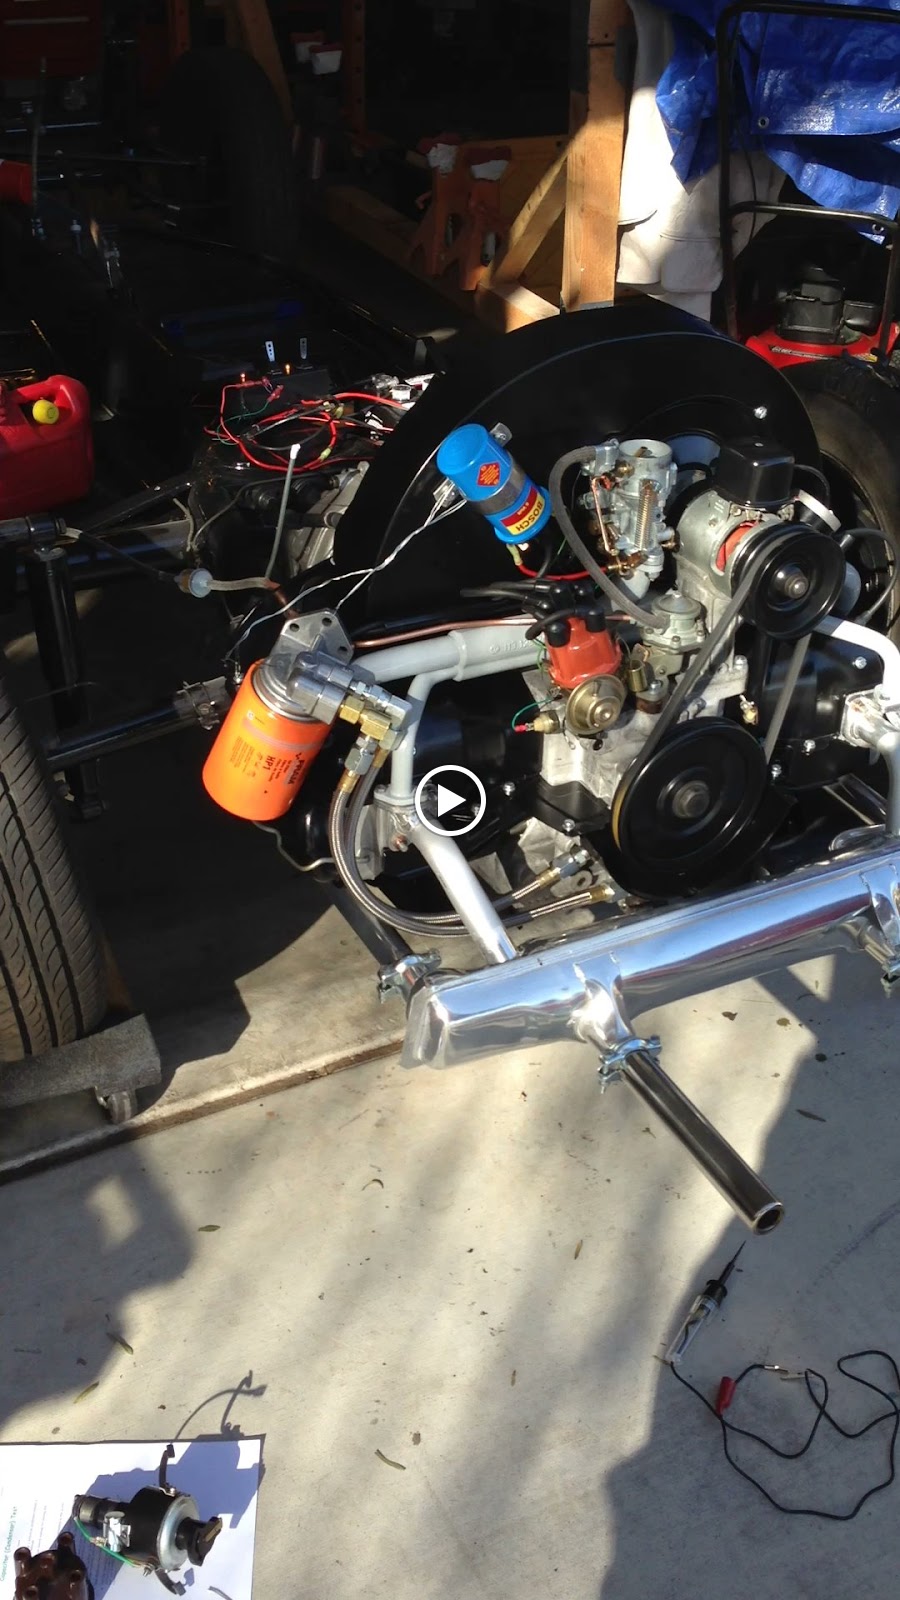
I then turned my attention to the distributor.  I figured out my problem what my problem was; timing!  I didn't line it up correctly so it wouldn't fire.  Well, I knew the engine would run because I had it on the other distributor.  I tried again with my original restored one, and it fired right up.  Glad to have that done!

The powder coat on my intake manifold chipped a bit where the hot exhaust gases pass up to heat the intake manifold.  This prevents carb icing.  I originally was going to take it off, but figured a little high temp paint and not worry about it.  There will be more bumps and bruises on the car so I can't get caught up in the super little details.  Also, this is my backup engine so I'll make sure to do it right on the original one.


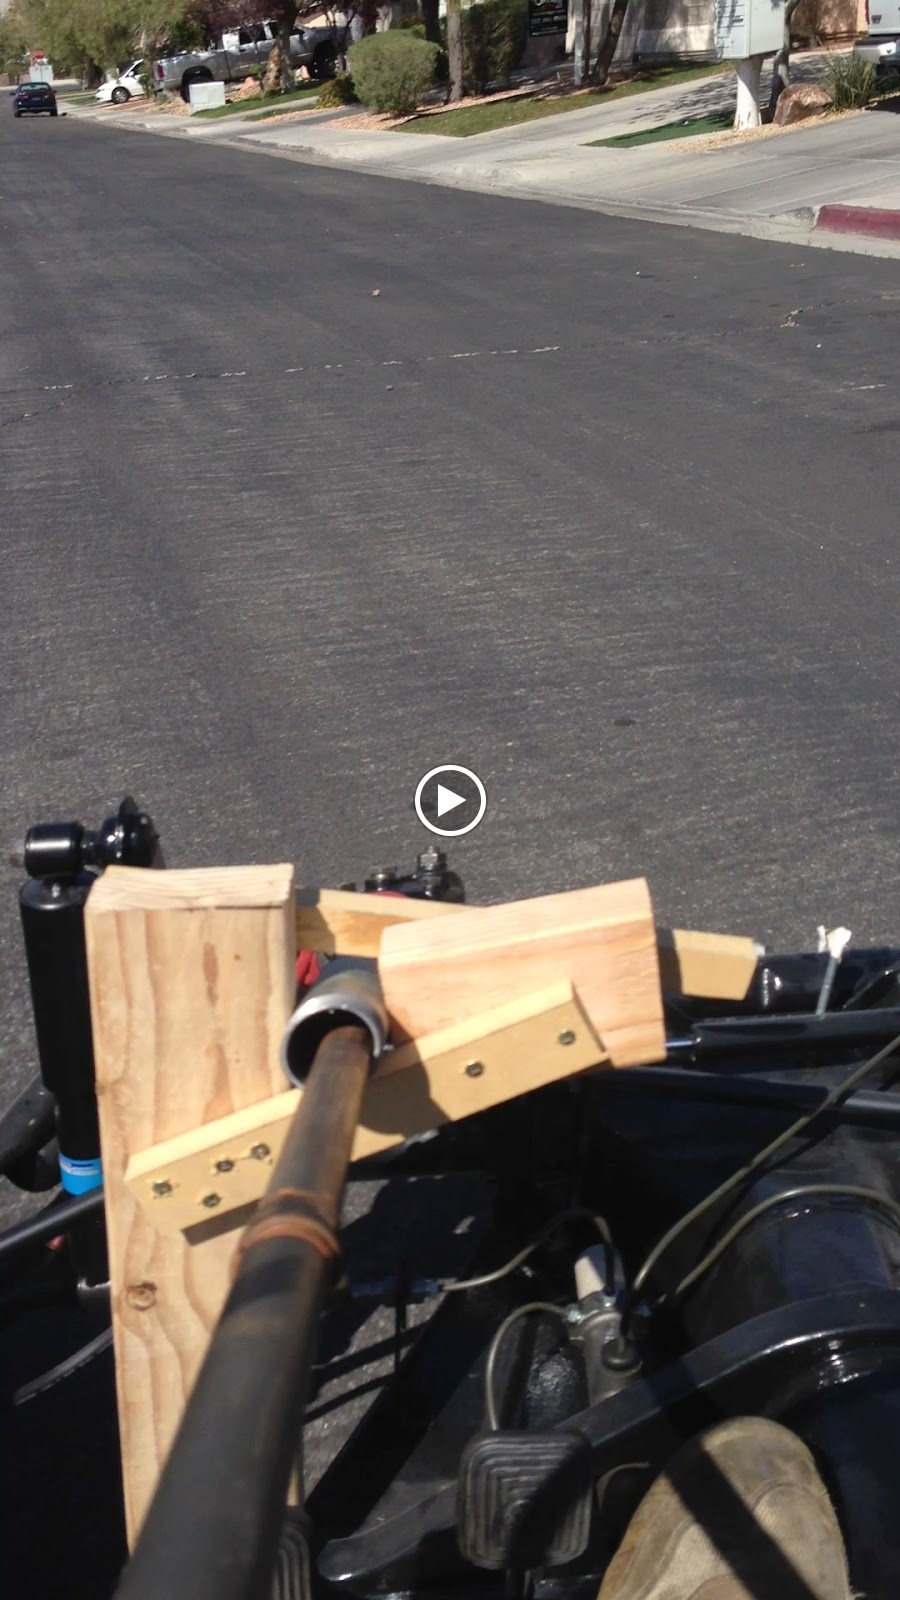
At that point, I went inside and had lunch but I wasn't done quite yet.  I decided to get it all ready for a test drive!  I secured the battery with the original cover and strap.  I zip tied the brake master cylinder reservoir so it wouldn't tip over.  I then installed the seat and mocked up the steering wheel.  I made a mount out of 2x4 wood and some random pieces to support it.  Started up and drove around the neighborhood probably 10 times.  It's only a 1/4 mile or so, it was still a lot of fun.  All gears shifted smoothly, even made it into 3rd with a quick check of 4th.


Only issue, which I knew about before, is that sometimes after coming off the throttle the engine idles higher than normal .  Once I blip the throttle it goes back to the proper amount.  I determined it had to do with the manual choke, which I think is because it isn't hooked up right now.  Once it is in the car, it will be hooked up and this problem should go away.  So now, sometimes when I come to a stop I have to blip the throttle like a Harley driver.  VROOM!


Very happy to be at this point, the next step now is to get ready for paint, particularly primer.  I need to get my air system tuned up, ready to go.  Thinking about buying an air dryer to make sure my compressed air is completely dry.  Already dry in the desert here, but still want to make doubly sure.  Once that is complete, I can then send everything off to to get media blasted.  I may take a day or two off as well :)

FREE RIDES TO ANYONE THAT WANTS ONE!!!!

Saturday, March 22, 2014

Day 71-74 -- IT'S ALIVE!

Well it certainly has been a whirlwind the past few days.  My flying buddy Paul came over and helped me get the new engine off the stand and put the original one back on to be worked on some other day.


I made a wood mount for the engine to slide on easily so that I could maneuver it around on my floor jack.  It even had a cutout for the circular piece on the floor jack and restraining straps to prevent it from tipping over.  If I remember I'll try and grab more pictures.

Flywheel mounted!


One issue I had was with the cooling flap cross bar.  Once I installed the oil cooler exhaust tin, it was rubbing on the cross bar.  A couple taps of the hammer and re-orienting the washers I am back in business with clearance.

The next day I installed the clutch and pressure plate.  And then, mounted the engine!


The rest of the day I spent dealing with wiring and starting issues.  I ran all the wires to my start box (shown in an earlier post).  I cranked until I had oil pressure.  I was getting fuel, but no spark.  I left it for the night and this is how it sat.

Today I chased the spark issues again, ultimately putting in a restored distributor I saved from this engine.  My new one has some issues and will need to be looked at.  I also have a chassis grounding problem which I will need to look at, I ran a cable to a transaxle bolt in the meantime.


The first start went well.  I tuned the carb after, changed the oil, and adjusted the valves.  I got the generator working with a new voltage regulator and polarized the generator.  It is now charging.  I had some leaks at the valve covers, fixed those.  Also had a leak by the fitting for my oil filter near the engine case.  Used loctite instead of thread sealant and fixed that problem.

So I need to chase the bad chassis ground, fix the distributor, and take it out for a spin!

Monday, March 17, 2014

Day 70

Well, I got my tins back from powdercoat and over the past couple of days have finalized the assembly of the engine.

The air cleaner had to be installed in reverse because it wouldn't fit the other way!  I don't know if this is going to bug me or if I'll find a different replacement.  I'm going to use it for now, it is an original piece, but not original to this type of engine...which is where my problem comes in.

The next step is to get it off the engine stand and install the flywheel, clutch disc, and pressure plate.  I also need to finish wrenching down the intake manifold bolts.  If you look closely you can see they rear facing nuts are very difficult to get at.  Waiting for some help with the heavy lifting and should be started soon!


Intake manifold is the grey piece, if you look at the larger pipe the nut is very hard to get at.


Monday, March 10, 2014

Day 67-69

The past few days I have been working on restoring an original oil bath air cleaner for the car.  The original style was a bit small for the larger capacity engine I am putting in the car so I sourced a larger and still original VW part from a 1966 Bug that will work with my bigger engine and still look factory.  The engine really is starting to turn into an amalgamation of different parts.  Should be fun for people to try and guess what it really is!

Just a reference picture.  Note the arm and associated holes. 
I'll have more pictures of the air cleaner later, but I basically painted it black on the outside and kept the original black on the inside.  I did modify the snout a bit so that a flapper valve and intake port (which I wasn't going to use) aren't there and I won't see any open holes.  Should look slick.  The original one looks like this.  As you can see, similar but to a purist a noticeable difference.


Today I received the original VW branded windshield I had shipped from Indiana.  There was an inspection sticker on it from 1979 and it had the VIN of the car.  After doing some research, car # 5563962 built in April 1963 donated its fairly good shape windshield to my project.  It has typical pitting and some rock chips but it is original.  I paid $90 shipped which is cheaper than a new one and has the original character (logo and pitting) that is what I'm after.  I'm more interested in original parts than brand new parts.


As you can see, it does have some fading around the edges where the laminate between the two pieces of glass is yellowing.  There are some chips and dings...but all is well!

The ever elusive VW logo!  DeLog was a VW subcontractor
I've literally had an ad out for an original windshield since I started this whole project, so I was happy to find an original in good shape.  I'll still keep looking in case I find a better one, but for now this one is good.

Still waiting for my powder coated tins to be finished.  After that, engine final assembly and starting!

Monday, March 3, 2014

Day 66

I spent the last few days getting the engine tin fitted to the engine.  I wanted to make sure it all fit and make any size adjustments before I send it out to powdercoat.  Specifically I worked on the fan shroud to modify it to accept stock cooling flaps.

I ended up cleaning this part up a bit more so it appeared more stock and less hacked together :)


I did have to modify the control arm for the flaps to clear the oil cooler.  I may not have had to do this if the arm was the right size.  I ended up having to rework the bends so it would reach the two pivot points.  When I did that, however, it made the arm closer to the cooler so I had to cut some away and then welded on another piece of metal below it to maintain the look and of course integrity of the part.

Taaaaa-dahhhhhhhhhh
 Here are the cooling flaps installed at the bottom of the shroud.  In order to make these work I had to drill holes to mount them and also cut notches so those 4 little arms could stick out.  These flaps are normally closed and when the engine warms up with a bellows type thermostat it pushes them open.  This is a very simple engine warm up device that helps the engine reach operating temperature quicker.  Modern cars have the same thing with their radiators so you don't cool the water before the engine is up to temperature.


Off to powdercoat, getting some odds and ends for the engine, and then waiting!  I have a few little things I can tinker on meanwhile.

Friday, February 28, 2014

Day 63-65

Well, I had to go back and re-read my last post since it has been so long!  I see it has been about a month since the case went together.  Needless to say, waiting for my cylinder heads and then finding time off was hard to come by, so I was a bit anxious to get started again.

While I wasn't working on the car, Paul the guy I fly with, sold his house.  Since he hasn't found a new one yet and is crashing with a buddy, I let him use my ample storage space/living room :)


It is also now spring!  Err something like that.  It has been unseasonably warm and this tree (not sure what it is) has great maroon leaves in the spring/summer/fall and these awesome flowers!

I put the pistons and cylinders on the engine.  Installed the pulley and pulley tin.


Unfortunately, I had everything bolted on (even the heads which are in the next few pictures) and was putting on a final part called the rocker arm.  This, essentially, is what opens and closes the intake/exhaust valves.  Well, needless to say while doing that a washer slipped out of my hand and down a push rod tube into the engine case.  I tried rocking the engine, rotating it on the stand, cursing, and although I could hear the washer rolling around I wasn't able to fish it out.  After about 5 hours of work assembling the engine I had to tear the entire thing down to the case halves.  Just like how it was nearly a month ago.

I found the washer...

It went together a bit easier since I had done it before. I finished around 1215am and had to wake up at 5 for work.  Worth it though because we all know I wouldn't be able to sleep if I hadn't it done it anyway!


The next day on a break in between flights I put the rockers on (underneath the black covers on each side of the engine) and managed to not drop a washer into the engine.  Hooray!  I also put the oil cooler on which is that tall upright piece.

And finally today I spent most of the day messing with engine tin.  Some of the pieces have already been to powdercoat but I had to wait for the cylinder heads to test fit the rest.  So I did that and will send the remaining tin out to powdercoat.

Tomorrow I have to modify the fan shroud for some thermostat flaps and some other odds and ends.  After the powdercoat comes back, final assembly and hopefully running!

Monday, February 10, 2014

Waiting on parts

Well, I was doing some measurements on the engine and found out my cylinder heads weren't going to work for a near stock setup.  Well, they would have worked, but the engine would have run a bit hotter and not as well.  So I sent them back to the machine shop and they are getting worked on.  In fact, they're actually making a whole new set of heads, and machining them the way I'd like.

I washed some of my used tin to get the light dirt and dust off of them.  It was chilly out that morning so I figured why not do it inside! :)

I also sent away some pieces to get black satin powder coated.  They should look very nice.

Since I haven't had much to do and work picked up a bit, I built this little starter box for when I am finally ready to actually start the engine.  I plan on mounting  the engine on the pan, but since the body won't be installed there are no wires, lights, or switches.  This box solves that problem.

Starting from the left, the first switch supplies power to the other circuits.  A yellow light lets me know that it is alive!  The next switch is the starter switch.  So when I'm ready to start, I just flip that up and once the engine starts, I flip it back down.  I looked for a momentary switch but couldn't find one that would work.  This setup will work fine too, it just won't spring load back to off once the engine starts.  You mean I have to think!?

Then a green light will identify low oil pressure.  And the red light will identify a bad generator.  Both of those lights should be off if all is going well :)

So, besides waiting for my heads...I'm kind of stuck.  I have to wait for the heads to put the cylinders on and even then, I have to wait for the powder coating to put the heads on.  So I'm kind of trapped by scheduling of parts.  I can do some work on modifying my aftermarket fan shroud to accept the thermostat flaps.  I think that will be my next project.

I tried to put some of the parts on the distributor today but found that my aftermarket clamp is getting in the way of the condenser which goes on the outside of the distributor.  I have a proper, used one on the way.

Once I get the heads on, I'll test fit some remaining tin and send that off to powder coat.  Bolt on the accessories and should be good to start...slowly but surely!